
Photo Wall Display Ideas You Can Set Up This Weekend
A blank wall says nothing about the people who live in the room. Photo wall display ideas fix that fast, turning a stretch of empty paint into something that actually tells your story. We like this project because it costs almost nothing if you already have printed photos sitting in a drawer somewhere.
You don’t need a level, a drill or any real design training, just some tape, a plan and photos you actually love. In this guide, we’ll walk you through several layout styles, how to hang everything without damaging your wall and how to pick a spot your photos will actually last in. Grab your favorite prints and let’s get started.
Planning Your Layout Before You Put a Single Pin in the Wall
The biggest mistake people make with photo wall display ideas is skipping the planning step and just starting to pin things up as they go. Lay your photos out on the floor first in roughly the shape you want on the wall, then step back and look at the whole arrangement before anything touches the paint. This lets you swap photos around, fix awkward gaps and settle on a final order without a single extra hole in the wall.
Making a Paper Template So Your Layout Goes Up Right the First Time
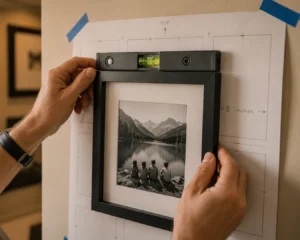
Once you’re happy with the floor layout, trace it onto painter’s tape or butcher paper cut to the exact size of your wall space. Mark where each photo goes directly on the paper instead of guessing at spacing once you’re standing at the wall. Tape the paper template to the wall and use it as a guide for exactly where each pin or hook needs to go.
This template trick alone prevents most of the crooked, uneven photo wall display ideas people end up unhappy with. Pull the paper down once every hook or pin is placed. Your final layout will match the plan almost exactly. It takes an extra ten minutes but saves you from a wall full of unnecessary holes.
The Clip and Twine Method That Costs Almost Nothing
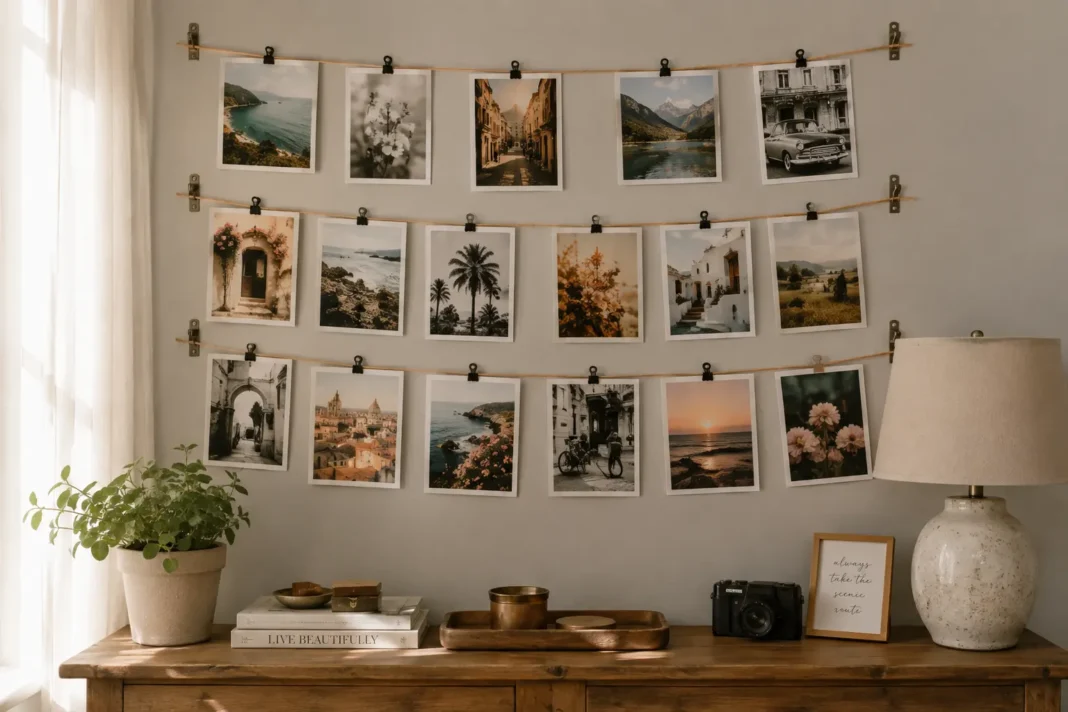
Twine and small wooden clips are the cheapest way to build a display. They cost only a few dollars for enough materials to cover an entire wall. String the twine horizontally between two nails or hooks, then clip your photos along the line at slightly different heights. Overlapping the clips just slightly keeps the line looking full instead of sparse.
This method is also the easiest to update since swapping a photo just means unclipping the old one and clipping in something new. No new holes, no new hardware, just a fresh photo in seconds. It’s one of the more forgiving photo wall display ideas if you like changing things up often. If you enjoyed tying knots for this style, our macrame plant hanger ideas use a similar simple twine setup for a different kind of wall project.
Using a Grid of Small Frames for a Cleaner Look
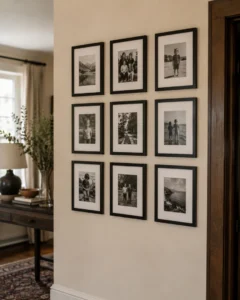
A grid of small matching frames reads as much more polished than a loose scatter of photos, especially in a formal room like a hallway or entryway. Pick one frame style and stick with it across the whole grid instead of mixing finishes, which keeps the eye focused on the photos instead of the frames. Even three rows of three frames create a strong, intentional-looking block on the wall.
Measure and mark your grid spacing with a paper template before drilling a single hole, since even a quarter inch of drift becomes obvious once frames are hung side by side. Use a small level for each frame as you go rather than eyeballing it. A grid only looks polished if every line is actually straight. Grid-style photo wall display ideas are some of the easiest to keep level since every frame follows the same simple spacing rule.
Adding String Lights to Make Photos Glow at Night
String lights add a soft glow that plain clips and frames can’t manage on their own, especially once the sun goes down. Weave a strand of warm white LED lights through your existing photo display, clipping photos directly onto the light wire instead of separate twine. This works especially well for dorm rooms or bedrooms where you want a bit of ambient light anyway.
Battery-powered strands are the easiest option since you won’t need an outlet anywhere near your display. Look for warm white bulbs instead of cool white, since warm tones flatter skin tones in most photos far better. A dimmer remote is a small extra cost that makes a noticeable difference at night. Lit-up photo wall display ideas also make a great low-cost alternative to buying a dedicated lamp for that corner of the room.
Mixing Polaroids and Printed Photos Without It Looking Messy
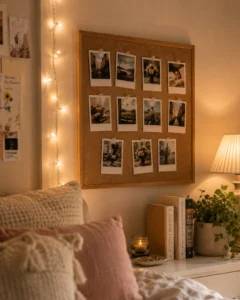
Polaroids and standard printed photos have different proportions, so mixing them without a plan usually looks cluttered instead of intentional. Group polaroids together in their own cluster rather than scattering them randomly among larger prints. The square polaroid shape reads as its own visual category. Separating it keeps the whole wall organized.
If you want to blend the two styles more directly, matte your printed photos down to a similar square proportion before hanging them. This small trick makes mixed photo wall display ideas feel far more cohesive than photos of wildly different shapes and sizes hung side by side. A little consistency goes a long way here.
Where to Hang Your Photo Wall Display for the Best Effect
The Library of Congress recommends keeping photographs away from direct light exposure to slow fading over time, which matters just as much for a wall display as it does for photos in storage. Choose a wall that gets bright but indirect light rather than one that sits in direct sun for hours each day. A hallway or an interior wall usually works better than a spot right beside a large window. The table below details photographic preservation, matting, and display safety standards established by the Library of Congress.
| Insight | Source (Institute) | Expert / Team |
| Wall-mounted photographic prints should be framed using acid-free matting materials and kept out of direct sunlight to prevent chemical degradation, UV fading, and thermal warping. | Library of Congress (Preservation Directorate) | Library of Congress Conservation Specialists |
| Secure mounting using archival-grade photo corners or hinge taping prevents mechanical strain on delicate paper emulsions while allowing physical support across hanging gallery arrangements. | Library of Congress Care & Handling Standards | Library of Congress Photographic Preservation Team |
Humid rooms like bathrooms will warp paper prints and loosen tape or adhesive strips faster than almost anywhere else in the house. Well-placed photo wall display ideas can last for years without fading noticeably if you keep them out of direct sun and away from moisture. Check your display every few months just to make sure everything is still secure.
Gallery Wall Layout Ideas That Look Wonderful Under $43
Gallery wall layout ideas focus more on structure than any single photo, using a mix of frame sizes arranged around one visual center point. Start with your largest piece in the middle and build outward with smaller frames on either side. Keeping consistent spacing, usually two to three inches between frames, ties the whole arrangement together.
Odd-numbered groupings tend to look more natural than even ones, so five or seven frames usually reads better than four or six. Mixing horizontal and vertical frames within the same layout adds visual interest without feeling chaotic. This approach works especially well going up a staircase or along a long hallway.
Polaroid Photo Display Ideas That Look Gorgeous Under $19
Polaroid photo display ideas lean into the format’s small square shape instead of fighting it with mismatched frames. A simple string-and-clip line works especially well here since polaroids are lightweight enough not to need real hardware. Grouping them in a loose grid on a corkboard is another easy option that costs almost nothing.
Writing a short caption directly on the white border of each polaroid adds a personal touch that printed photos usually skip. Rotate a few polaroids at a slight angle instead of keeping every single one perfectly straight for a more relaxed, scrapbook feel. This style works especially well for a desk area or a small bedroom wall.
Budget Photo Frame Wall Ideas That Look Beautiful Under $33
A budget photo frame wall relies on buying a handful of cheap, matching frames instead of one expensive statement piece. Discount stores and thrift shops are reliable sources for basic frames in standard sizes like four by six or five by seven. Painting mismatched thrifted frames the same color instantly makes them look like a matched set.
Print your photos at standard sizes to avoid paying extra for custom framing or trimming prints down by hand. Black and white printing is often cheaper than color and gives a whole wall a more cohesive, gallery-style look. A dozen small frames can usually be put together for less than one large statement frame would cost.
Conclusion
A twine and clip line above the desk, a tidy grid of frames in the hallway or a glowing string-light display in the bedroom all start with the same simple planning step. Photo wall display ideas don’t require expensive frames or professional help, just photos you love and a little patience with the layout.
Start with the floor-planning trick before you touch the wall, then pick whichever style matches the room you’re working with. We’d love to see what you put together, so share a photo of your finished wall whenever it’s ready. Your favorite memories deserve more than a drawer.
Frequently Asked Questions (FAQs)
How many photos do most photo wall display ideas actually use?
Most simple displays use somewhere between eight and fifteen photos, depending on the size of your wall. Starting smaller and adding more over time is easier than committing to a huge layout right away.
Will tape damage my wall paint?
Painter’s tape and removable adhesive strips rated for walls generally won’t damage paint if removed slowly and at an angle. Test a small hidden spot first if you’re renting or unsure about your wall’s paint type. Most photo wall display ideas that use painter’s tape hold up fine for months without leaving marks behind.
Should I print photos myself or use a photo lab?
A photo lab almost always produces sharper, longer-lasting prints than a home printer for a similar cost per photo. Save the home printer for quick drafts while you’re still finalizing your layout.
Can I mix framed and unframed photos in the same display?
Yes, though it usually looks more intentional if you group framed pieces separately from clipped or pinned photos. A fully mixed, scattered combination can start to look cluttered rather than curated. A lot of the best photo wall display ideas actually mix a few loose photos in with the framed ones on purpose.
Where should I avoid hanging a photo wall display?
Skip walls in direct sunlight or in humid rooms like bathrooms, since both will fade or warp your prints over time. A hallway or bedroom wall out of direct light is usually the safest choice.


[…] heights looks intentional and put together. If you’re decorating that same wall, our photo wall display ideas pair nicely with a row of painted pots on the sill […]