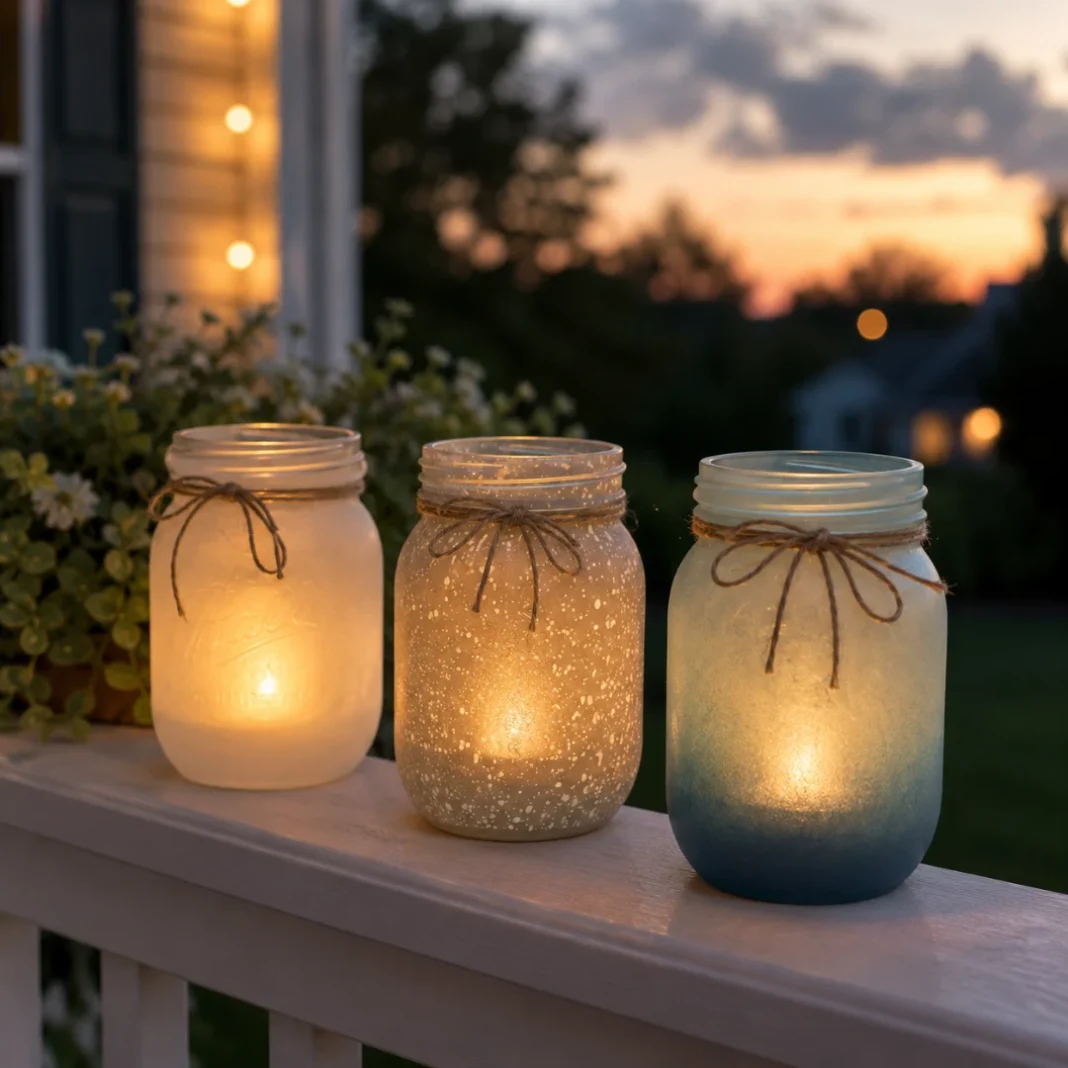
Painted Mason Jar Lanterns You Can Finish This Weekend
An empty mason jar sitting on a shelf does nothing for a room until you actually do something with it. Painted mason jar lanterns fix that fast, turning a jar you probably already have into a soft, glowing accent for a porch or windowsill. We like this project because it costs almost nothing if you’re starting with jars from your recycling bin instead of buying new ones.
You don’t need glass-painting experience, just a clean jar, some paint and a battery tea light to finish the look. In this guide, we’ll walk you through a few painting techniques, adding a handle and picking the safest light source to use inside. Grab a jar and let’s get started.
Prepping Your Jars Before Any Paint Goes On
Wash your jars thoroughly with hot, soapy water to remove any leftover label residue, then let them dry completely before touching any paint. Rubbing alcohol on a cotton pad removes sticky glue residue that soap alone often leaves behind on the glass. Painted mason jar lanterns hold their finish far longer when the glass is genuinely clean and free of oils before you start.
Lightly sand the outside of the jar with fine sandpaper if you want your paint to grip better, since smooth glass can be slippery for some paint types. This step is optional for acrylic paint but genuinely helps with certain glass paints that need texture to bond properly. Wipe away any sanding dust with a damp cloth before moving on to painting.
The Frosted Glass Look Using Just One Paint Technique
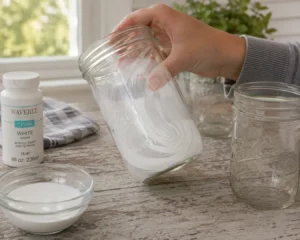
Mix a small amount of water into acrylic paint, roughly one part water to two parts paint, then swirl it inside the jar and pour out the excess. This diluted technique coats the inside of the glass unevenly on purpose, creating a frosted, textured look once it dries. Roll the jar slowly as it dries so the paint doesn’t pool entirely at the bottom.
This frosted technique is one of the fastest painted mason jar lanterns you can make, usually ready to handle again within an hour. The light that shines through ends up soft and diffused rather than a single bright point, which looks especially nice at night. Let the jar cure fully for at least 24 hours before handling it roughly or adding a light inside.
Painting a Speckled Night-Sky Design
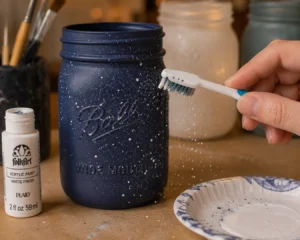
For a night-sky look, paint the entire jar with a dark navy or black acrylic first and let it dry completely. Once dry, dip an old toothbrush lightly in white or silver paint and flick the bristles with your thumb to spatter fine dots across the surface. Practice the spatter technique on scrap paper first, since the angle and pressure take a try or two to get comfortable with.
Vary the dot sizes by holding the toothbrush closer or farther from the jar for some larger, more prominent stars among the smaller speckles. Painted mason jar lanterns in this style look especially striking once a light is placed inside and the tiny unpainted dots let real light shine through. Let the finished design cure fully before adding a tea light or handling the jar.
Adding a Wire Handle for Actual Hanging
Wrap a length of thin wire twice around the neck of the jar, just below the rim, twisting it tight enough that it won’t slip once weight is added. Bend the remaining wire up and over the top to form a handle, twisting the end securely against the neck wrap to lock it in place. Pliers make twisting tight wire wraps much easier than trying to do it with your fingers alone. This detail is what turns a simple painted jar into genuine painted mason jar lanterns you can hang instead of just setting down.
A wire handle turns your jar into something you can actually hang from a hook or a tree branch instead of only setting it on a flat surface. Copper or brass wire adds a warmer, more finished look than plain silver wire for most painted styles. Test the handle’s strength by gently lifting the empty jar before adding a light inside.
Choosing Battery Tea Lights Over Real Flames
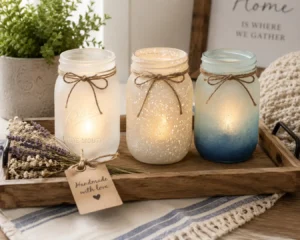
The U.S. Fire Administration recommends considering battery-operated flameless candles and keeping any lit candle at least 12 inches away from anything that can burn, a real risk worth taking seriously for painted mason jar lanterns used indoors or near anything flammable. Battery-powered LED tea lights avoid this risk entirely while still giving a warm, flickering glow that looks convincingly like a real flame from a few feet away. They also mean your painted finish never faces direct heat, which helps it last longer.
If you do want a real flame, choose a votive or tea light candle that sits well below the rim of the jar, never a taller candle that could touch the painted glass. Always place lit lanterns on a stable, heat-safe surface away from curtains, bedding or anything else flammable. Battery options remain the safer default for most everyday use, especially around kids or pets.
Sealing and Caring for Painted Glass Lanterns
Seal painted mason jar lanterns with a clear matte or gloss sealant spray if they’ll be handled often or used outdoors, since sealant protects the paint from fingerprints and moisture. Apply the sealant in thin, even coats outdoors or in a well-ventilated space, letting each coat dry fully before adding another. Two light coats generally hold up better than one heavy coat that can drip or pool.
Wipe finished lanterns with a dry or barely damp cloth rather than soaking them, since prolonged water exposure can eventually lift even a sealed painted design. Store unused lanterns somewhere dry between seasons rather than a damp garage or shed. With reasonable care, a well-sealed painted jar can last for years of regular use.
Frosted Glass Jar Lanterns That Look Beautiful Under $17
Frosted glass jar lanterns lean entirely on the diluted paint technique for a soft, evenly glowing look without any additional design work. This style works well for anyone who wants a finished result without freehand painting or spatter techniques. A single color keeps the whole process to under fifteen minutes per jar.
Group three or five frosted jars at different heights along a porch railing or mantel for a cohesive, layered glow once lit. Vary the jar sizes slightly for visual interest instead of using all identical containers. This style is one of the most budget-friendly options on this list since it needs only one paint color per batch. This approach is also the cheapest way to test the frosted technique before committing to a full themed set.
Speckled Night Sky Jar Designs That Look Wonderful Under $23
Speckled night sky jar designs take the darker base coat and spatter technique further with tiny painted constellations connected by thin white lines. Reference an actual star map for a specific constellation like Orion or the Big Dipper for a more personal, intentional design. This version takes longer than a plain spatter but creates a genuinely unique centerpiece.
A small dot of glow-in-the-dark paint mixed into a few of the stars adds a subtle effect once the lights go out entirely. Let each paint layer cure fully before adding the next, since rushing this style tends to smear the fine details. This design works especially well as a gift for anyone who loves stargazing. A small tag noting the constellation name adds a thoughtful detail if you’re giving the finished jar as a gift. Pair one with our pressed flower resin tray for a small handmade gift set that costs very little to put together.
Colorful Ombre Jar Lanterns That Look Stunning Under $21
Colorful ombre jar lanterns blend two or three paint colors gradually from the base to the rim instead of using one flat color throughout. Start with your darkest color at the bottom and blend upward with progressively lighter shades while the paint is still wet. A dry brush technique softens the transition between colors for a smoother gradient.
This style photographs especially well and makes a colorful centerpiece for a summer gathering or outdoor party. Work quickly once you start blending, since acrylic paint dries fast and loses its blendability within a few minutes. Practice the gradient technique on a spare jar before committing to your final set.
Conclusion
A soft frosted jar on the windowsill, a speckled night-sky design on the porch or a colorful ombre set for a summer party all start with the same clean jar and a bit of patience while the paint cures. Painted mason jar lanterns don’t require glass-painting experience or expensive supplies, just a jar, some paint and a safe light source to finish the look.
Start with the frosted technique if you want the fastest possible project, then try spatter or ombre designs once you’re comfortable with the basics. We’d love to see what you paint, so share a photo once your first lantern is glowing. Your porch deserves better than another plain, empty jar.
Frequently Asked Questions (FAQs)
What kind of paint works best for painted mason jar lanterns?
Acrylic craft paint is the easiest option for beginners since it’s affordable, widely available and works well on clean glass. Dedicated glass paint exists too and can offer more durability for pieces that will be washed often.
Can I put a real candle inside a painted jar?
A small votive or tea light that sits well below the rim is much safer than a taller candle. Battery-powered LED tea lights remove the fire risk entirely while still giving a realistic warm glow.
How long does the paint take to fully cure?
Most acrylic paint is dry to the touch within an hour but benefits from a full 24 hours before heavy handling or sealing. Rushing this step is one of the most common reasons paint chips prematurely. Most painted mason jar lanterns are safe to seal or handle heavily once this full cure window has passed.
Will the paint wash off if the jar gets rained on outside?
Sealed painted mason jar lanterns generally hold up fine to occasional rain, though prolonged soaking can eventually affect even sealed paint. Bringing jars inside during heavy or extended rain extends how long the finish lasts.
What’s the easiest style for a first attempt?
The frosted glass technique is the fastest and most forgiving option for a first try, since there’s no freehand painting or precise technique required. It also uses just one paint color and minimal supplies. It’s also the version most people recommend trying first before moving on to spatter or ombre painted mason jar lanterns.