
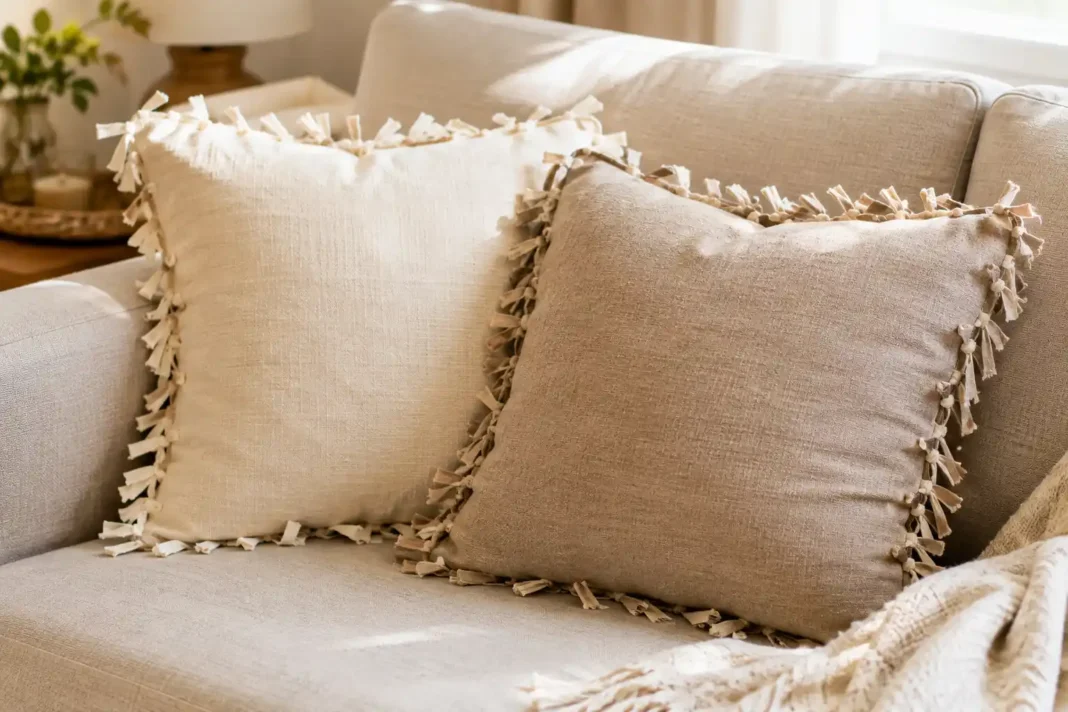
No Sew Throw Pillows You Can Finish in an Afternoon
A sewing machine sitting unused in a closet stops a lot of people from ever starting a fabric project. No sew throw pillows fix that completely, since scissors, fabric glue and a little patience are the only tools you actually need. We like this project because it costs less than a single store-bought pillow and still looks intentional once it’s finished.
You don’t need to know how to sew a single stitch, just how to cut a straight line and follow a simple pattern. In this guide we’ll walk you through a few different no sew techniques, from a quick fringe-tie pillow to a cleaner glued version. Grab some fabric and let’s get started.
Picking Fabric That Actually Works Without Sewing
Pick a medium-weight woven fabric like cotton or a cotton-blend rather than anything too stretchy or slippery, since stretchy knits are harder to cut evenly and glue holds better on woven material. University of Tennessee Extension’s 4-H sewing guide recommends steering beginners away from striped fabric for a first project, since matching a pattern across seams adds unnecessary difficulty. A solid color or a simple print is far more forgiving for your first no sew throw pillows. The table below details fabric bonding, fringe-tying methods, and textile craft standards published by UT Extension and Tennessee 4-H Youth Development.
| Insight | Source (Institute) | Expert / Team |
| Creating no-sew fleece or fabric pillow covers using uniform knotting/tying techniques or heat-activated hem tape secures pillow inserts tightly without requiring sewing machines or thread stitching. | University of Tennessee Extension / Tennessee 4-H | UT Extension Consumer Science Specialists |
| Measuring equal square cuts at fabric corners before tying perimeter fringe ensures symmetrical corners and prevents interior stuffing from bunching or shifting over time. | UT Extension Family & Consumer Sciences | Tennessee 4-H Youth Development Program Team |
Buy about half a yard more fabric than your finished pillow size to account for trimming and any mistakes along the way. Wash and dry your fabric before cutting anything, since fabric can shrink slightly the first time it’s washed. Iron out any wrinkles so your measurements and cuts stay accurate throughout the project.
The Fringe-Tie Method That Needs Only Scissors
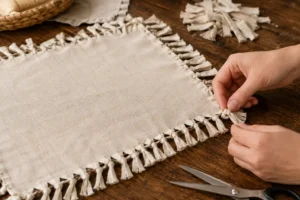
Cut two matching squares of fabric, each about an inch larger than your desired finished pillow size on every side. Lay the two squares together with the patterned sides facing each other, then cut even fringe strips about an inch wide around three of the four edges. Leave the fourth edge uncut for now, since that’s where you’ll add stuffing later. This fringe method is one of the fastest no sew throw pillows you can make from start to finish in under thirty minutes.
Tie each matching pair of fringe strips together in a simple double knot, working your way around three sides of the pillow. This method needs nothing but scissors and your hands, no glue and no heat required at all. Once three sides are tied, you’re ready to stuff the pillow before finishing the last side.
Using Fabric Glue for a Cleaner, No-Fringe Look
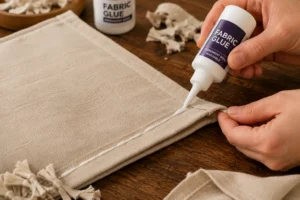
Fabric glue creates a cleaner, more polished edge than fringe-tying if you want something that looks closer to a store-bought pillow. Apply a thin, even line of fabric glue along three edges of your two fabric squares, pressing them firmly together and holding for about thirty seconds per section. Let the glue cure fully according to the package instructions, usually a few hours, before moving the pillow at all.
No sew throw pillows made with fabric glue hold up surprisingly well to regular handling once the glue has fully cured. Avoid bending or folding the glued seams while they’re still setting, since this can create weak spots that separate later. A second thin layer along stress points, like corners, adds extra durability without much extra effort.
Envelope-Style Covers You Can Change in Seconds
An envelope-style cover skips permanent glue or knots entirely, using an overlapping fabric flap on the back that you can open anytime. Cut one piece for the front and two overlapping pieces for the back, sized so the overlap covers about a third of the pillow’s width. Glue the outer edges together, leaving the overlapping back section unglued so it functions like a real envelope opening.
This style lets you swap the pillow form or insert out whenever you want, which fringe-tied or fully glued no sew throw pillows don’t easily allow. It also makes washing the cover much simpler, since you can remove it without cutting anything open. This is the version we’d recommend if you like changing your decor seasonally.
Stuffing and Shaping Your Pillow the Right Way

Polyester fiberfill is the easiest stuffing option for a first pillow, since it’s inexpensive and holds its shape well without clumping over time. Stuff the corners first, working small handfuls into each corner before filling the center, so the finished pillow doesn’t end up lumpy in the middle. Overstuff slightly, since fill always settles and compresses a bit once you start using the pillow regularly. Most no sew throw pillows use somewhere between twelve and sixteen ounces of fiberfill for a standard eighteen-inch size. Buy slightly more than you think you’ll need since fill always compresses over time.
A foam pillow insert gives a firmer, more structured shape if you prefer that over loose fiberfill. Close the final open edge using whichever method you used for the other three sides: tying, gluing or tucking into an envelope back. Fluff and shape the finished pillow by hand once it’s fully closed.
Caring for No-Sew Pillows So the Seams Actually Hold
Fringe-tied no sew throw pillows generally hold up fine to normal use but shouldn’t go in a washing machine, since agitation can loosen the knots over time. Spot clean with a damp cloth and mild soap instead, working gently to avoid pulling the fringe apart. Let the fabric air dry completely before using the pillow again.
Glued seams are more water-sensitive than tied ones, so keep glued pillows away from damp environments and spills where possible. Envelope-style covers are the easiest to keep clean long-term, since the removable cover can be hand-washed separately from any insert. Whichever method you choose, gentle care extends how long the finished pillow actually lasts.
Fringe Tied Throw Pillows That Look Beautiful Under $21
Fringe-tied throw pillows skip glue entirely and rely only on hand-tied knots around the fabric edges. This version is the most kid-friendly of all the no-sew methods, since there’s no heat, no fumes and no sharp tools beyond scissors involved. A double knot at each fringe pair holds securely without any special technique.
Vary the fringe width slightly for a more textured, deliberately imperfect look instead of perfectly even strips throughout. Two contrasting fabric colors on the front and back add visual interest once the fringe is tied and the pillow is flipped to show both sides. This style pairs especially well with a casual, boho-leaning room. This is also one of the cheapest ways to test a new fabric pattern before committing to a bigger project.
Envelope Back Pillow Covers That Look Wonderful Under $25
Envelope back pillow covers are ideal for anyone who already owns pillow forms and just wants a fast way to refresh their look. A single yard of fabric typically makes one full envelope cover, making this one of the more material-efficient options on this list. Swapping covers seasonally costs very little once you have a few different fabrics on hand. If you’re refreshing a whole living room corner, our wood slice coaster ideas make an easy low-cost pairing for the coffee table nearby.
Iron the overlapping back seam flat before gluing for the cleanest, most professional-looking finish. A contrasting button or fabric tie across the envelope opening adds a small decorative detail without much extra effort. This style photographs especially well for anyone documenting a home project online. Keep a few extra yards of your favorite prints on hand so refreshing the look later takes minutes instead of a shopping trip.
No Sew Accent Pillow Shapes That Look Stunning Under $23
No sew accent pillow shapes go beyond a basic square, using simple round or bolster-style patterns for more visual variety on a couch or bed. Circular pillows need a slightly different cutting approach, tracing a plate or bowl as a guide before cutting your fringe or gluing edges. The tying or gluing process itself stays exactly the same as a square pillow.
Bolster shapes work well for reading nooks or window seats where a traditional square pillow doesn’t fit the space as naturally. Roll the fabric into a tube shape before securing the ends, using the same fringe-tie or glue method on each round end. This shape takes slightly more fabric but uses identical no-sew techniques throughout. A pair of bolster pillows on either end of a window seat can completely change how finished the whole space feels.
Conclusion
A fringe-tied pillow on the reading chair, a cleanly glued accent piece on the couch or a swappable envelope cover on the bed all start with the same two pieces of fabric and a little patience while things set. No sew throw pillows don’t require a sewing machine or any real stitching skill, just fabric, scissors and a technique that matches your patience level.
Start with the fringe-tied version if you want the fastest possible project, then try gluing or an envelope back once you’re comfortable with the basics. We’d love to see what you make, so share a photo once your first pillow is finished. Your couch deserves better than another mass-produced accent pillow.
Frequently Asked Questions (FAQs)
How much fabric do most no sew throw pillows actually need?
A single 18-inch pillow typically needs about half a yard of fabric for both the front and back pieces combined. Buying a bit extra accounts for trimming, fringe and any cutting mistakes along the way.
Is fabric glue strong enough to hold a pillow together long term?
Yes, quality fabric glue holds up well for years of normal use once it’s fully cured according to the package directions. Reinforcing corners and stress points with a second thin layer adds extra durability for pillows that get handled often. Most fabric glue brands marketed for no sew throw pillows list their exact cure time right on the bottle.
Can I make these without buying a sewing machine at all?
Yes, that’s the entire point of no sew throw pillows, since fringe-tying, fabric glue and envelope-style backs all skip a machine entirely. Scissors, fabric and either glue or your own hands are genuinely all you need.
What’s the easiest style for a first attempt?
The fringe-tied method is the fastest and most forgiving option for a first try, since there’s no glue drying time or curing to wait through. It also uses the fewest supplies of any style covered here. It’s also the version most people recommend to a friend trying this for the very first time.
Can kids help make these?
Fringe-tied no sew throw pillows are genuinely kid-friendly with adult supervision for the cutting step, since tying knots needs no sharp tools or heat. Glued versions are better suited to older kids or adults, given the drying and handling involved.


[…] uses only a fraction of the yarn a single large piece would need. Pair a finished piece with our no sew throw pillows in a matching fabric for a coordinated textured […]