
Homemade Candle Making Ideas You Can Pour This Weekend
Store-bought candles rarely smell like anything specific to you. Homemade candle making ideas fix that by letting you choose the exact scent, color and container that actually fits your space. We think this is one of the most satisfying crafts to try since you can see, smell and use the finished product the same day you make it.
You don’t need a workshop or special equipment, just a pot, some wax and a stove you already have. In this guide, we’ll walk you through the basic pouring process, how to pick the right wick and a few styling tricks that make homemade candles look store-bought. Let’s melt some wax.
Gathering Your Basic Candle Making Supplies
Before you melt anything, gather soy wax flakes, pre-tabbed wicks, a pouring pitcher, a thermometer and whatever containers you plan to pour into. Soy wax is the easiest option for homemade candle making ideas since it melts at a lower temperature and cleans up with just soap and water. A basic starter kit with all of this costs surprisingly little for how many candles you can make from one batch.
Melting Wax the Safe Way
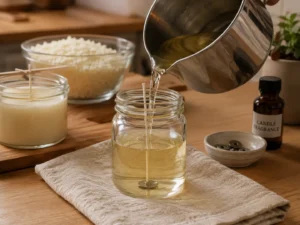
Melt your wax flakes in a double boiler setup, a heatproof pitcher set inside a pot of simmering water, rather than directly over a burner. Direct heat can scorch the wax or cause it to overheat past a safe pouring temperature. Stir occasionally as it melts to help the wax heat evenly throughout the pitcher. Getting comfortable with this basic melting step is really the foundation for every one of the homemade candle making ideas covered later in this guide. It’s worth practicing on a plain, unscented batch before moving on to fragrance or color.
Most soy wax needs to reach around 185 degrees before you add fragrance, then cool slightly before pouring. The National Fire Protection Association notes that candles should always be watched closely while lit and kept away from anything flammable, a habit worth building from your very first pour onward. Never leave melting wax unattended on the stove, even for a minute. The table below details candle safety, flame containment, and thermal stability guidelines established by the National Fire Protection Association (NFPA).
| Insight | Source (Institute) | Expert / Team |
| Homemade candles must be poured exclusively into non-combustible, heat-resistant containers (such as sturdy glass or metal tins) to prevent vessel fracture and containment failure during burn cycles. | National Fire Protection Association (NFPA) | NFPA Home Fire Safety Specialists |
| Keeping candle wicks trimmed to 1/4 inch before lighting limits flame height, prevents soot accumulation, and reduces the risk of thermal flashpoint hazards in homemade wax blends. | National Fire Protection Association Educational Guides | NFPA Research & Safety Engineering Team |
Picking and Centering the Right Wick
Wick size depends entirely on your container’s diameter. Using the wrong size is the most common reason homemade candle making ideas end up with a weak flame or a candle that tunnels down the middle. A wick that’s too thin won’t melt the wax evenly out to the edges. A wick that’s too thick can burn too hot and create excess soot.
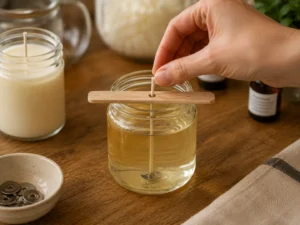
Most wick manufacturers print a sizing chart based on container diameter, so measure your container before buying wicks rather than guessing. Centering the wick before you pour matters just as much as picking the right size. A simple wick holder or two clothespins laid across the container top keeps it centered while the wax sets. Getting the wick right on your first few homemade candle making ideas saves you from having to melt down and repour an entire candle later.
Adding Fragrance Oil at the Right Temperature
Add fragrance oil once your melted wax cools to around 185 degrees, not while it’s at its hottest, since adding it too early can burn off the scent before the candle ever sets. Stir the fragrance in thoroughly for a full minute so it distributes evenly throughout the wax. Most fragrance oils call for around one ounce per pound of wax for a noticeable but not overwhelming scent.
Let the scented wax cool a bit more before pouring, usually down to about 135 degrees, since pouring too hot can cause cracking as the candle cures. Pour slowly and steadily rather than dumping it in all at once. This single step is where most homemade candle making ideas actually go wrong for first-time makers.
Layering Colors for a Two-Tone Candle
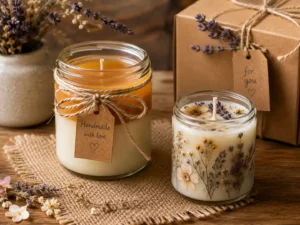
For a layered, two-tone candle, pour your first color and let it fully set before adding a second poured layer on top. Rushing this step causes the layers to blend into a muddy middle color instead of a clean line. Patience here matters more than any special tool or technique. Set a timer for this step instead of guessing, since even five extra minutes of patience makes a visible difference in how clean the line looks.
Alternate warm and cool tones for the most striking contrast, like a deep amber base under a soft cream top layer. Two-tone homemade candle making ideas photograph especially well and make thoughtful gifts once wrapped simply. Label the scent and pour date on the bottom before giving one away.
Curing and Trimming Your Candle Before You Burn It
Trim the wick to about a quarter inch before the very first burn, since a longer wick burns hotter and produces more soot than necessary. Let a new candle burn long enough on its first use for the melted wax pool to reach the edges of the container, usually an hour or two depending on size. Skipping this first full burn is one of the easiest mistakes to make when you’re excited to use a candle right away.
This first full burn prevents tunneling on every burn after it, so don’t rush to blow it out early just because it looks done. Store finished candles somewhere cool and dark until you’re ready to use or gift them. Well-made homemade candle making ideas can sit finished for months without losing much scent if stored properly.
Soy Wax Container Candles That Look Beautiful Under $25
Soy wax container candles start with the same basic pour process but skip fancy layering or shaping entirely. Choose a heat-safe glass jar, center a wick and pour in one single layer for the simplest possible project. This is the version we’d recommend for a genuine first attempt. If you want a more decorative container, our painted terracotta pot ideas work surprisingly well as heat-safe candle vessels once sealed properly.
Reused jars work just as well as new ones, so save an empty jam or candle jar instead of buying a fresh container. Clean any old wax residue out with hot water before reusing a jar. A mismatched set of reused jars actually looks intentional once they’re all filled and labeled. A single-pour candle like this is also the cheapest way to test a new scent before committing a full batch to it.
Essential Oil Candle Scents That Feel Effortless Under $19
Essential oil candle scents appeal to anyone who prefers a more natural fragrance over synthetic fragrance oils. Lavender, eucalyptus and citrus oils are forgiving starting points since they hold their scent reasonably well through the melting and curing process. Natural oils generally throw a lighter scent than synthetic fragrance oils, so use a bit more than you’d expect.
Test a small batch before committing an entire pour to a new scent combination, since some essential oils blend better together than others. Citrus and mint are a reliably fresh pairing for a kitchen candle. Lavender and vanilla lean cozier for a bedroom or living room piece. Keep a small notebook of your favorite blends so you can recreate a scent you loved without guessing at the ratio again later.
Dried Flower Candle Designs That Look Gorgeous Under $23
Dried flower candle designs press small dried botanicals into the outer wall of a candle for a decorative, layered look. Pour a thin outer layer first, press dried petals or herbs against the still-soft wax, then pour the rest of the candle once they’re set in place. Keep dried materials away from the wick itself for safety. This technique takes a bit more patience than a single-pour candle. The finished look is worth the extra step for a gift.
Lavender buds, small rose petals and dried citrus slices all work well for this technique and hold their color reasonably well once sealed in wax. Trim any petals that stick up too far from the surface before the final pour. This style works especially well as a gift since it looks more elaborate than it actually is to make.
Conclusion
A single-pour soy candle on the counter, a two-tone gift candle wrapped in twine or a dried flower design on the mantel all start with the same melted wax and a bit of patience while it cures. Homemade candle making ideas don’t require a workshop or expensive equipment, just wax, a wick and a scent you actually love.
Start with the simplest single-pour version before trying layers or pressed flowers, then build up from there once the basics feel easy. We’d love to see what you pour, so share a photo once your first batch has set. Your home deserves a scent nobody else’s candle aisle has.
Frequently Asked Questions (FAQs)
How much does it cost to try homemade candle making ideas for the first time?
A basic starter batch of wax, wicks and one container usually costs between fifteen and twenty-five dollars. That’s often enough material for several candles depending on container size.
Is soy wax better than paraffin for beginners?
Soy wax is generally easier for beginners since it melts at a lower temperature and cleans up with soap and water instead of solvents. Paraffin can throw a stronger scent but requires more careful temperature control. Most beginner homemade candle making ideas online recommend starting with soy wax for exactly this reason.
How long do homemade candles need to cure before burning?
Most soy candles cure for about one to two weeks before their scent fully develops. Burning one too early usually means a noticeably weaker fragrance than it would have at full cure. Marking the pour date on the bottom of each candle helps you keep track of which ones are ready to burn.
Why does my candle have a sunken, uneven top?
This usually happens when wax cools too fast or wasn’t poured at the right temperature. A quick second thin pour once the surface cracks can smooth it out afterward. A hair dryer on low heat can also gently smooth a sunken top without a full second pour.
Can I reuse candle jars once the wax is gone?
Yes, scrape out remaining wax, wash with hot soapy water and the jar is ready for a fresh pour. Reused jars are one of the cheapest ways to keep making candles without buying new containers each time. This is one of the easiest homemade candle making ideas to repeat again and again without buying anything new.


[…] extra. This style works especially well for housewarming or holiday gifts. Pair a set with our homemade candle-making ideas for a complete gift that costs very little to put […]